Monday, July 13, 2015

Thrift Store Gold

Over the weekend I struck thrift store gold...well brass to be exact :-) If no one has ever told you, thrift stores are the bomb! Nevertheless, I'm always so awkward when I'm inside of one. I'm the chick holding stuff ten feet away from her--not because I think I'm too good (I surely don't), but because who truly knows if all the donations have been cleaned? Just the thought of it makes my skin crawl. Imagine that cute pencil skirt on the bottom of someone's closet  amidst dirty shoes. Or  picture that beautiful vase in a damp, dark basement with water from God knows where leaking on top of it, EWWW!  *Deep breath* But I digress.
Lately when I set out to the thrift store I'm looking to score on décor. Where else can you find unique and quality items for three bucks or so? Usually the prices are right up my alley and I've been fortunate enough to land some pretty cool pieces. The trick? Don't allow ugly color schemes to chase you away. When I'm searching for pieces I focus mostly on shape, if the item has engravings that will pop then that makes it even better. Who cares if something is an ugly Pepto-Bismol color? A few coats of paint (or an even quicker fix: spray paint) can make a old piece look brand new. So without further ado, this is what I bought:
 Get a good look at these beauties...
I absolutely LOVED the look of all these pieces as is, but I didn't think the colors would flow with the space that I purchased them for. Anyhow, See what  I mean about detail rich pieces?

 I found these candle holders bogged down under a bunch of crappy picture frames. They just scream the 1920's to me. Paid $3.13 a piece for them! That's cheaper than you would be able to find it anywhere.
 

I really liked the color variation on this figurine, but again I didn't think that it would work in my room, I regret that now...

This was from an older thrift store run (I think it's a planter). Like the others I loved it as is, however, I decided that I would paint it too.
 
Most times when I paint something  it enhances the appearance, but I have to admit that I actually liked these pieces better BEFORE I tampered with them :(


The color did not give off the shine that I wanted (the same brand in gold does), and more importantly I genuinely liked the pieces in their original state--oh well, no use crying over spoiled milk! Now let me explain what's going on with the bowl.
 
When I was searching for furniture I came across this in Art Van, and I freaking fell in love.

Unfortunately, this was only for display, but being the book lover that I am, I thought that it was the coolest thing. Right then and there I decided to try to recreate the look the first chance that I got.  Never mind the fact that I was mutilating a book to show my love of books...SMH...weird I know. Nonetheless, the pages of the chosen book would live in a way that other books could only hope to.  I headed to the dollar store and searched for the book with the nicest pages--and then proceeded to tear it to shreds. I already had twine at home, so no cost there. To create this look simply tear the pages from the book, roll them up, wrap the twine around several times, and secure it with a double knot. Be sure to cut off access twine and you're done.

End result. I ended up having to stuff the bottom with gift paper to hoist the scrolls up, and my bowl is a little too tall...but the general idea was achieved. I'll keep my eye out for a more appropriate bowl in the future.
And here are all 3 of my fabulous finds in their new home:
 
*Sigh* The paint job kinda cheapens the pieces, but you win some, you lose some. Once I thought about it, I probably could have kept them all how they were. Thank God I decided to hold off on painting the sconces.
 
There was also one more thing that I found at the thrift store that day:
 
Fishes!
I have no idea if this is what this is supposed to be used for, but  I will definitely be using the fish for door decoration...at a later date of course. I'm still swooning over my yellow wreath, I never want to take it down. Not sure how I will cope once the season change.
Here's a bit of a close up of the fish:
I love the bright colors. This is giving me New Orleans all day :)
 
By the way, the fish were listed at $8.75, but they only set me back $3.99...why you might ask...because I said that I didn't want to pay that much for them. Nothing is ever to cheap to not seek a deal.
 
So there you have it, my weekend thrift store finds and adventures with makeovers. Everything that you see here cost only about $20 bucks...I almost feel like a thief.  Next time you're in the thrift store, remember to look for hidden gems that can be upcyceled, or what should have happened in this case, left as is. Happy Shopping!


Wednesday, July 8, 2015

Landscaping From Scratch

Why didn't anyone warn me just how expensive and time consuming landscaping could be?! We began tackling the front yard in early spring and it has been an endless effort ever since. Every time that I think we're gonna see a little progress it's as if the universe screams SIIIIKKKE, and then we basically find ourselves still at square one. If I were to say that we've been working our butts off it would be a gross understatement. :-( We've been putting in work, getting down and dirty--me, the hubby, & the baby. The good part is that doing it yourself is a lot cheaper than hiring the professionals. Have you seen their prices?! Besides, nothing feels quite as good as looking over something proudly and saying to yourself, "I did that"...but it has definitely been a process. When you're out in the yard, sweat rolling down your brow, and you're two hours pass the time that you said that you wanted to leave your house on the weekend (it's only 52 of them), questions start to come to your mind...lots of questions. Perhaps it's no philosophy, but here's just a few things that I've been pondering:
  • Why am I paying for dirt?
  • Why can't I just use my own dirt?
  • What's wrong with my dirt?
  • If I am paying for dirt why is it so much?
  • Why is gardening fabric so high? I'm sure I bought shirts for less money.
  • In the same vein, why is mulch so high?
  • How could you need more than 10 of those gigantic/heavy bags to fill such a small section?
  • Why do I have to replenish it every year?
  • Why don't the color last longer?
  • Why are the flowers I want the most almost always annuals?
  • You think I'm gonna pay this much annually?!
  • How do you justify a tree being 500 bucks? Yeah, that's staying there bruh!
  • Why bushes $20 (or more) a pop?
  • Why is that plastic border so high?
  • I can't recreate that somehow with something else?
  • Why some flowers don't have the little description picks? I need to know zones son!
  • Why the weeds not leaving and the grass not feeding?
  • Why my husband acting like a senior citizen--talking bout spraying the yard before it rains all the time?
  • You mean I can't just put this plant in the ground?
  • Plants like Epson Salts?
  • Grow darn it!!! Did I do something wrong?
  • Didn't I JUST water you yesterday? How much is this adding to my bill?
  • Where can I find a pile of FREE rocks?
  • We have to buy more tools???
  • Why is the ground so...hard?
  • How many times are we going to go up to this store?
At one point or another all of these things have gone through my mind. Is it just me? I mean, I can remember my mom buying flowers back in the day (from Bordine's Nursery no less) and I just didn't realize how much these types of things cost. I definitely have a new found appreciation for people's landscape; it's amazing what you notice when you are in a similar process. Let me just say this, I am sure it will take YEARS for our yard to look the way that I want it to (if ever), and that's a little on the depressing side :-(

Our yard had zero landscaping going on when we moved in. Well, there was the big Lilac bush that was reaching our first rooftop--no lie, and a couple other random plants in various stages of death. My husband and I quickly decided to rectify the situation when the spring rolled around. By the way, moving that Lilac bush to the backyard needs a post of its own! We THOUGHT that the yard was something that could be done quickly and cheaply to improve the outer appearance of our house. That's been our plan with everything--low hanging fruit first. Too bad we had no idea what it took to upgrade a yard.

Without a doubt, this is one of my absolute favorite pictures. My little guy is such the helper, and at 3 years old he believes that he can do anything his dad can.

This was the very beginning stages, tearing out the grass in order to make our flower beds.
 
Nothing happens fast when it comes to doing your own landscaping. It has been a slow and daunting process, and we're nowhere near finished.
There were a lot of times that we had to just throw in the towel and leave things for another day...see how far that border is up? It stayed that way for a couple of days (maybe even until the next weekend). And OMG look at that sad-patchy grass!
After weeks of searching the free world, I finally found my Annabelle Hydrangeas (the white ones)...don't even wanna talk about what these few items cost :-(
We always allow the little one to help, it helps to curb his jitters on an otherwise boring day of yard work ;-) Here he is adding Epsom Salt to the dirt before we planted our Hydrangeas.
He even has his own garden gloves. I thought they were cute and very much needed with some of the chemicals found in the dirt!


We eventually got the border to where it needed to be (see how much lower it is?). Also, laid new dirt and poured more grass seeds! Not pictured here, but it looks much better today thanks to that process along with my hubby's obsession with Weed & Feed.


Admiring the partial view of one of our new beds from my 'romantic writing room'. I had to have a Weeping Cherry Tree on that side. In the springtime when the cherry blossoms are in bloom it will look absolutely whimsical :) Cherry blossoms swaying in the breeze equals an element of romance to me!
 

Digging beds, buying supplies, purchasing greenery--I can't tell you how much time has been spent or actually how much money has gone into the project--and this was just for the front. Never mind, the fact that the backyard still has to be done. I don't even want to think about it.

One thing working to our advantage is that our neighbor is literally a Gardening Guru--I'm talking HGTV skills. Her yard is AMAZING! She has been gracious enough to show us the tricks of the trade and we're very appreciative, already we've learned so much.
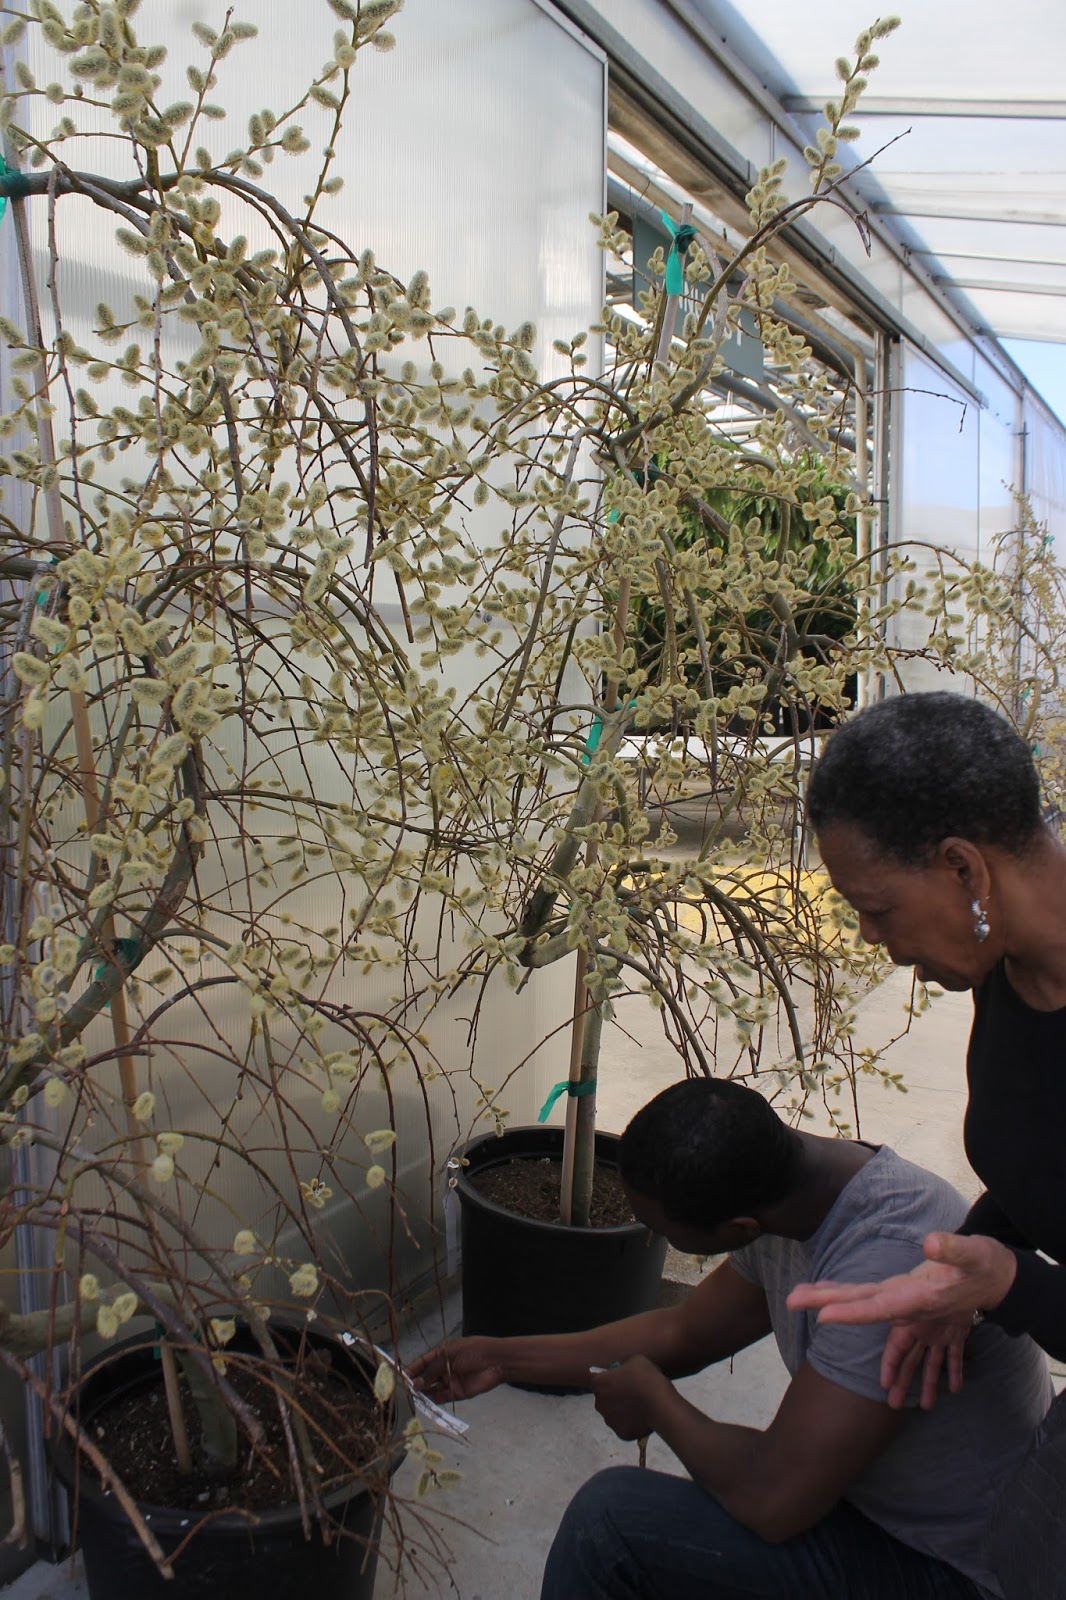
Here's our neighbor giving us a much needed crash course at the nursery about zoning!


She is extremely passionate about horticulture, and it shows. She puts love into her yard and she puts it into ours too. But she's given us more than just a few pointers, she's also generous in sharing her plants--amongst them are various species of Hostas, Coral Bells, Ligularia, Bleeding Hearts, and Creeping Jenny. Her generosity has definitely helped to offset our cost and has allowed us to put the bulk of our funds towards higher priced items like bushes and trees. We bonded with our neighbor over gardening and now she is more like a aunt; she even went on our last self-guided historical tour with us (yay for historic lovers).

This process has certainly opened my eyes to a whole new world, one where experience and patience is of the upmost importance; unfortunately I don't have much of either. Moreover, I feel like Home Deport, Lowes, and the various other nursery's have smacked me around in the back alley and stolen my purse. Yes, I believe the prices are flat-out robbery. When I think of the money we've spent on the yard I could kick myself because there's no doubt in my mind that I could have the chandelier that I want by now--and then some. My husband is always sure to remind me that curb appeal is important--and it is. But it's what's on the inside that counts right? I'll know better next time.

Now we're basically just waiting on the end of the season sales. The plan is to landscape the backyard with all close-out items--I hope it works out that way. At the end of the summer, once everything is in full bloom, I will update the blog with more pics. By that time we hope to also have our sedum garden completed (the hubby has already begun ripping out the grass for that). I am sure that more yard work awaits us this weekend, but right now all I want is a little bit of chill time and possibly a chance to use my ol' dusty passport. A girl can dream right? Until the next time...wish us luck!!!

Monday, July 6, 2015

Fun Times & Rushed DIY Projects

Hello World! How was your holiday weekend? I hope great, mine turned out to be amazing. We didn't make one single plan, but somehow it was action packed--a lovely weekend indeed. But more about that later. This is going to be a pretty random DIY post, but first I have to show you the fabulous find that I picked up over the weekend!
You like it? I like it!


I've been eyeing this little birdie at Target since the springtime. It goes without saying that I was not loving the $19.99 price tag. Anyways, I walked in on Friday (thank God for long weekends) and guess who was sitting in the clearance section? Can you guess how much I paid for it? :-)

Bam! Now that's more like it!


Ok, so now that that's out the way (yes, I really had to share)...about a month or so ago I was aimlessly strolling the clearance aisle at Walmart trying to avoid paying an arm and a leg for some decent solar lights. I didn't have any luck with the solar lights but I did come across this:

Rope? $3.00? Well I don't mind if I do!


It's called Twisted Sisal Rope. The package says that it is supposed to be used for landscaping and gardening. At the time that I put it in my basket I had no idea what I would do with it, but at only $3.00 I figured I could think of something. I've always liked the rope look so there were numerous possibilities.
On a whim, I decided to go ahead and do another coffee can project since I still had another can laying around that I brought home from work. SIDENOTE: the can that I had was a bit dented, however, because it was being wrapped I knew that no one would be able to tell once I was finished--including myself. Environmentally friendly is always the way to go!
I peeled the can and washed it just like I did for my bag dispenser project.  Here's the link if you want a refresher: http://harrishousexoxo.blogspot.com/2015/06/bag-lady.html
Even though I knew I would be wrapping the can, I decided to spray paint it gold just in case a bit of the tin peeked through. However, I made a pretty dumb mistake...

See all of those water bubbles frozen in time?


This is what you don't want your tin to look like. My husband was rushing me to get our day started,  and in my race against time it completely slipped my mind that I needed to allow my can to dry before spaying it. *DOH* So I was stuck with "lovely" little water marks all over my can. Thankfully, because I planned on wrapping the can the mishap wasn't that big of a deal--however, it could have been a real disappointment had I been going for another look.

Once the paint was dry (no more slipups for this chick) I put a dab of hot glue at the very top of the tin to connect the rope and then continued to wrap it around until I reached the bottom. Once I reached the bottom I secured the rope with another squirt of hot glue. I have to say, this wasn't the easiest rope I've ever worked with, it tended to want to twist and twirl on it's on. This made for a annoying balancing act of untwisting and wrapping--which was a tab bit cumbersome. Nevertheless, the entire project still clocked in at under fifteen minutes. A word of advice: try to make sure that your starting and ending point is on the same side of the can to give it a clean, cohesive look. Once your rope is positioned the way you like you can  gently lift it to add a bit of glue here and there to give it a tighter hold. I skipped that step since I might reuse the rope on another project down the line. Because of the recycle factor, I wanted the rope to be fairly easy to remove. When you're done, be sure to clip any fly-aways (as always, a few will remain).

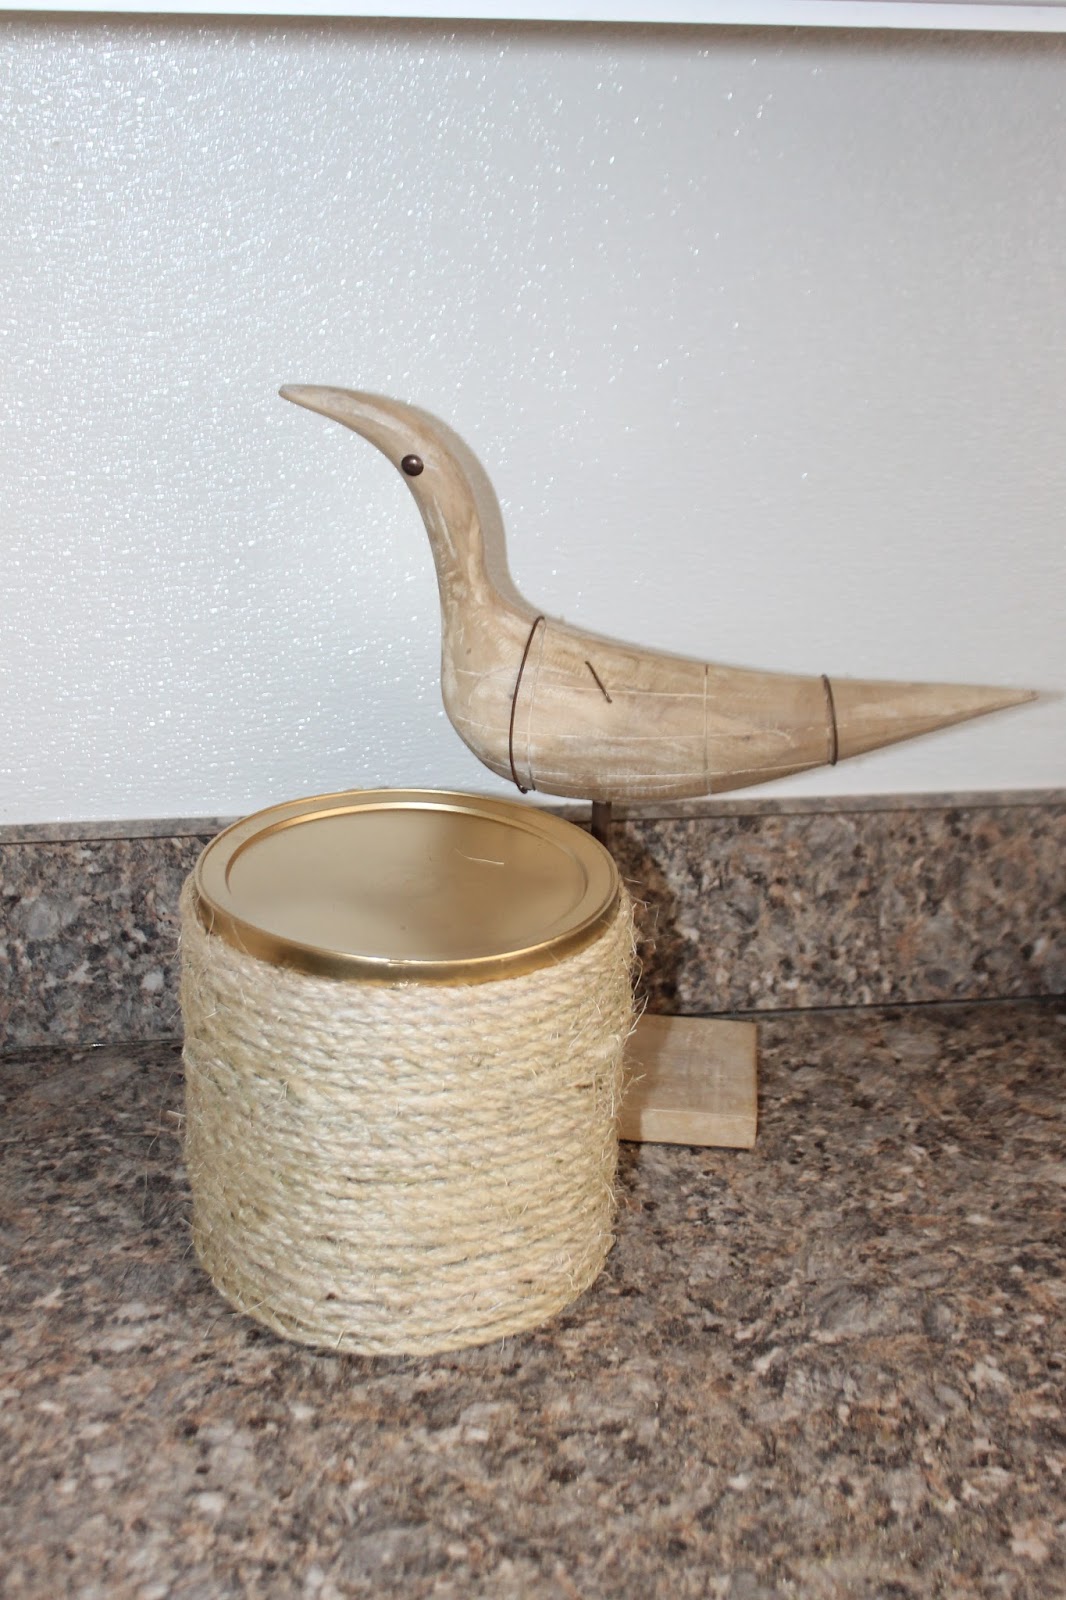
And here it is--the final project. I think this makes for a great container to store bulky jewelry, small toys, tea light candles, or you could even use it as a potter. After all, the packaging stated that the rope was meant for landscaping and claims to be sunlight resistant--so outdoor potting, that's  definitely an option.

Ta-dah!


And here's a pic of both of my great new additions:

Can't wait to set these out :-)

Now, on to the weekend...it was GREAT. We ended up checking out homes built in the 1800's and riding a train that was built in 1875. Cool Beans!!

Nice!
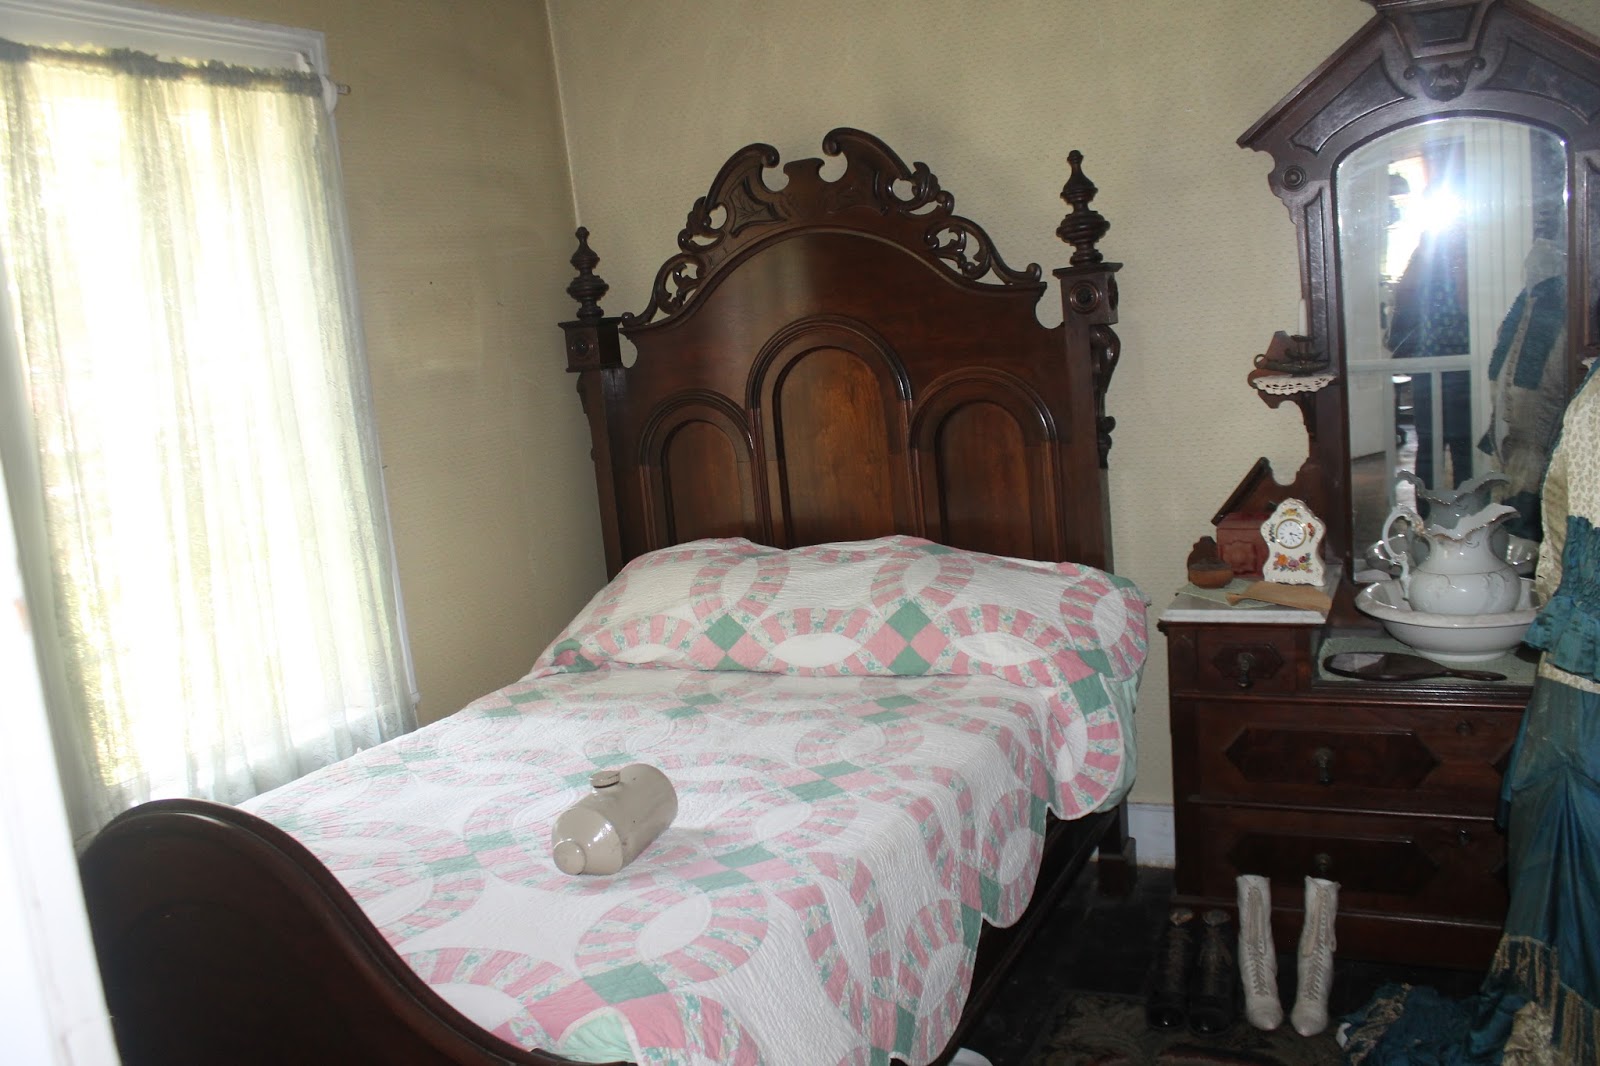
One of my favorite homes at Crossroads Village...this stuff NEVER gets old to me

The living area...

& I thought that my bedroom was small!!

 
Such a great way to spend an afternon...


We also hit up the beach, here's a few of my favorite shots:

 Me and my Baby Love...
Mommy's cutie in his 4th of July best ;-)

Over the weekend there were so many great moments had (& captured), I wish that I had time to share them all. We had an absolute blast and it was completely unexpected.

So how about you? Did you get into any DIY projects? Catch any good deals? Have a super awesome time with the family? Inquiring minds wants to know! Drop a pic of your most recent DIY in the comments.

Wednesday, July 1, 2015

Beauty On A Budget

When it comes to the outside of the house, if there is one thing that I love, it is definitely a door wreath. Wreaths provide the perfect opportunity to add a little décor and showcase your personal style. In my opinion, wreaths can instantly upgrade the entire appearance of a residence--separating the houses from the homes. Wreaths say that you care...or at least that you're trying.

As soon as we got our new door, the next order of business was to get a wreath (I wanted one long before, but there was no way in the world that I wanted to bring attention to the ugly thing that we were calling a door at the time). I instantly hit the internet searching for something that I liked, and what I found was some really nice wreaths...that were criminally overpriced.

A $140 for a baby breath wreath?? Is it the breath of baby Jesus??
 
When it comes to style mine is quite eclectic, the only requirement is that I like it, easy enough. So I should have found plenty of things right? Not so. Everything was a tab bit more expensive than what I willing to pay. I hit up the internet to give you an idea of what I'm talking about:
 
Price: $215. I loved the fullness/messiness of it...but nope. I am definitely not paying that!
Let's move on...
Price: $72. I love burlap. I also love that this is clean and simple--but it's a little too simple in my opinion for the price...
Price: $179. Nothing puts me in the Christmas Spirit like festive décor. But at this rate nothing would put me in debt like it either.
Price: $70...Pretty, but WHY does it cost so much?
 
Just for laughs, check out this article on the world's most expensive door wreath: http://abcnews.go.com/blogs/lifestyle/2013/12/worlds-most-expensive-christmas-wreath/
I swear, sometimes I think that rich people just don't know what else to do with their money. SMH.


After several 'heck nawl' searches, it finally dawned on me that it would be cheaper to just make my own wreath. Well, to have my mom make it. She is awesome with arts & crafts--even had her own booth at our local flea market for a little while and it was very well received. If I could trust her with my wedding bouquet and centerpieces surely she could make something for my door, why hadn't I thought of that earlier? I asked her if she could do it, she happily agreed, and that should have been that--but it wasn't.
 
The first Michael's that I went to had nothing--I'm not exaggerating--they had nothing. Some sort of sale was going on and the flower department had been practically cleaned out. The second Michael's I went to didn't have a thing either, at least not a thing that I wanted to pay for. There is nothing that anyone can tell me that constitutes one silk flower being $7.99 or more. I know the old saying rings true, you get what you pay for. But I place value where I will, and a handmade/factory created flower is just not that valuable to me. Sorry. I did, however, use my 40% off coupon to take my grapevine wreath (the bones of it--just the frame) down to about two bucks. Score? :-/
 
After trying a few more stores with absolutely no luck, my mom suggested that I go to the Dollar Tree. At first I just laughed, there was a certain look I was going for and the dollar store wasn't a part of it. But after a few more disappointments I stumbled into my local dollar store, somewhat mad that I was there. This is going to be a wasted trip I said. I guess it's not meant for me to get a wreath I thought. And then it happened. My eyes landed on some bright yellow flowers that were "good enough"! They may not have looked like the $7.99 flowers at Michael's, but they were about the $3.99 grade, and they were a dollar--on bushes...


*Insert angels singing* What I felt like the moment I saw the flowers! :-)
 
So I grab up a few yellow flowers, some green berry things, a brown bird, and skipped up to the register like I was on the yellow brick road. If there is one thing I'm certain of, it's that my momma can work her magic...my wreath was just as good as made. So without further ado, here is the result! 


How lovely is this?! MyMommaIsTheBomb.Com
I like that it's simple yet stunning. The bright colors are sure to catch the eye from the street, and the earthy vibe nods to my hippie chick side. Unfortunately, the bird isn't pictured in the photograph. My mom told me to clip it where I wanted it.
Price: Under $10 :-)
And that's it. It took a bit of effort, a whole lot of disappointment, and a mother's love, but THIS is what I call beauty on a budget.
 

Monday, June 29, 2015

She-Shed...Yes Please!

Organizing is supposed to make things better right? So why do I feel so overwhelmed? Over the weekend I purchased a shoe organizer--if one more shoe made it's way in front of our door I was going to scream. Sometimes just getting out of my house felt harder than trying to bust out of  Alcatraz. I'm usually the type of person that NEED order in my life, so I'm not really sure whether to be proud or concerned that I let the situation slide for so long. Nonetheless, the problem is fixed now, but it's only opened the door for, dun, dun, dun... more issues. I feel confined! I've been working hard to ensure that everything has a place, things are where they should be and easily accessible, etc., etc., etc.; however,  now I feel that there is no space for me to create (aka be messy). I use to do all of my arts & crafts in my "sun-room", but now that its been turned into my "romantic writing room" doing anything that could possibly get a little out of control is a definite no-no. No biggie right?  I decided to move on to the dinning room--our dinning room table was the perfect place to experiment. But after doing my first tablescape the hubby asked me to leave it set, taking away yet another area for me to create. Whomp, whomp, whomp.
Here's a pic of the set up that got me booted out. Never mind the missing plates, we were about to get down to business! :-)
 

The only space that I have left now is our third floor--which is slowly but surely being turned into a closet *sigh*. What's a girl to do? I love to plug in my hot glue gun and let loose, spray painting excites me, and making a mess is all a part of the process...
In my quest to become more organized I've lost my freedom. I guess it's true that artist thrive best in chaos (controlled of course). Now even the smallest projects require me to go out into the garage, weather permitting...and that sucks.

Not one to be confined to my current circumstances, I started researching some reasonable ways to add a little square footage to my life. I came across garden sheds--the woman's answer to the man cave. Yes, I realize that I already have a room to call my own, but I truly do need this. If I don't spray paint something soon I just might lose my mind. There are so many styles of sheds, the possibilities are endless-- if my hubby gets up off his butt. Usually, if he sees me doing something it will prompt him to come help...let's hope that happens. I'm thinking about just going to buy the wood and standing around looking like a damsel in distress. That's all I've got. That's my plan. *wink*

Blueprints for sheds are accessible right from Pinterest. Just in case you have no idea what I'm talking about here's some eye-candy:

 
Love the storage space options <3

 
I can already imagine my colorful/artsy work studio :-)


How awesome is this?! If you tell me that you don't want it that's a lie (Tupac mode)
 
I'm so praying this becomes a reality for me soon. I'd want to make one for our bambino first though. I can just imagine his squeals of happiness as he spends hours on end in his very own space! He could also learn a thing or two while tending to his "house." Everything is a learning experience right (building my argument)?
 
 
Yes, this is the mini-me version...
 
Kids are living so good these days!
 
My husband is quick to remind me that our yard isn't that big, and I am quick to remind him that it isn't that small either. WHERE THERE IS A WILL THERE IS A WAY! And I am without a doubt sold on the idea of a shed...currently stacking my coins now. What about you? 'Yes Please' or 'Pass' on the shed? 


Wednesday, June 24, 2015

From Eek to Chic

Apparently, back  in the day cherub tables were all the rage (think 1960's-ish). I begged my granny's table off of her even before I knew where I would put it. I had grown up seeing the table and thought it would be nice to "remix" a small piece of my childhood. However,  nothing, and I do mean nothing, ever works as planned. As soon as I opened my trunk the table rolled out, slammed on my foot and broke apart. WTH! It had survived all those years and I broke it in the matter of minutes, I  could have cried. I didn't have the heart to just throw it out, so I limped to the garage and put it with the rest of the stuff that was quickly piling up.

Fast-forward a couple of months later and I had the best idea: I could glue the table together! Who cared if it was broken? It was old anyways and the crack would add character. Antique is in! I could hardly contain myself as I ran out to the garage to get started on my project. I searched all over-- but no table. Come to find out, my husband had thrown it away just days earlier. Talk about an angry woman. There was so much rubbish piling up in our garage but he picked THAT to throw away?! Just my luck...

So I was back to square one; only now my heart was a little heavier as I imagined my granny's table in some landfill somewhere. There was nothing I could do to get it back, so I did the next best thing. I jumped on the net and started searching for a replica. I eventually came across what I was looking for, but the pieces were higher than expected--I'm talking much higher, in the hundreds :-(
I finally settled on a reasonable one, but it was still more than I would have liked to pay. Luckily my husband bought it for me for Mother's Day. Good save.

Of course, while I was searching for a table I came across similar styled lamps--naturally, my life wouldn't be complete without one. But again I ran into the same problem--the lamps were just too much darn money ($169 was the cheapest). After a little more digging I spotted one on Craigslist for a whopping...TEN BUCKS! I bought that thing so fast it would make your head swim (can you tell my grandparents are from the south?) :-)  I was super excited, however the pieces had just been sitting tucked away into a corner of my writing room until this past weekend.

I got up early Saturday morning and headed to Lowes on a mission. This would be the day that I got down to business. Let me tell you, sample paint is everything! I got more than enough paint and a pan for just a little over 3 bucks. Now I am trying to figure out if there is anything else in my house that I wouldn't mind being Vessel Gray ;-)

Again I headed out to the garage and got to work. The finished product was even better than I hoped. It's amazing what just a little paint can do--it took my pieces to a whole new level and I am more than happy to display them now. :)

Here's some befores & afters:

 Preparing to start the paint job...yes, I currently have to do all of my painting outside :-(
 

 Table top view...my granny's table was a bit taller (which is what I wanted) but whatever...
 

Close up of cherubs...I LOVE that detail!

 And after! Pics aren't as clear as I would like them to be, but you get the idea.
 

The Color is Vessel Gray and it gives my pieces a really refined look. By the way, I didn't have a roller at the time so everything was painted by brush. The table top shows just a bit of brush strokes--which I actually like. If that isn't your thing make sure you have a roller on hand for the flat surfaces.

The lamp! Cool huh? Again, the detail was stupendous. Nice on its own, but I knew I could upgrade it ;-)
 
Turned out fab! Now the hunt is on for the perfect lamp shade.
 
So there you have it, with just a little paint these pieces went from eek (well not really eek to me, but you know...) to chic. The next time you come across something that needs a little love consider salvaging it by slapping a coat of paint on it, the results could truly be amazing. Happy Transforming!